Movies are cool. Television is cool. YouTube is cool. Let’s use that coolness in our projects!
Teachers have been asking students to make film and video a part of project-based learning for generations, especially when VHS formats increased accessibility. And now that digital technology has made those old tape formats archaic, the accessibility and flexibility have increased dramatically. Of course, you’ll need the right tool for the job, and determining which tool will work for the specific job you want can be difficult. Worry not! Read below for 5 tips on how you can use Chromebooks and other simple tools to turn each student into a master movie maker!
Most of these tips discuss apps and extensions that add directly into a Google account. Once added, they become part of the user’s account and will open each time the user opens the account. Becoming comfortable with adding these tools can help you add to your and your students’ digital toolboxes. But, do not feel overwhelmed. Just think about what you want to do and read the process!
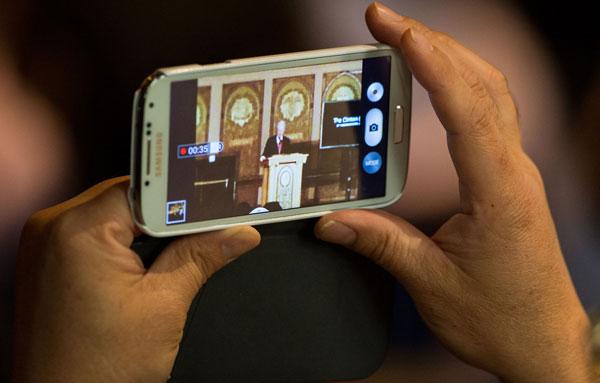
One: You and your students can use smartphones to record video footage.
 A surprising number of students carry smartphones with them to school every day, and that means each one of them carries a video camera with them. If you want your students to shoot footage without being limited to a desk and Chromebook, ask them to use their phones. They know how to use the video recorder on their phone, so recording is no problem. Once the recording is made into a file, they can share it with you or upload it into a video editor simply. They can either upload it to Google Drive using the Google Drive phone app or email it to their Gmail account. Both methods bring the file to the cloud, where they can do what you’d like them to do with it.
Advanced tip: Google Classroom now allows for students to submit photos taken on a phone straight to a Classroom assignment. Check out this video to see how.
Two: Students can use Chromebooks to record themselves.
 Chromebooks can record audio and video through the webcam installed in the machine. This makes the Chromebook ideal for recording a single student or pair of students reading, opinionating, or discussing. Just aim and shoot. The best app for this is ClipChamp. A student can download the ClipChamp app through their Chromebook Webstore. The app is then loaded any time they need it. Clicking it takes students to the ClipChamp web page, where a single click begins recording. Then, once the file has been completed, the student can upload it straight to their Google Drive. ClipChamp doesn’t even require an account. Simple!
Three: Students can use Chromebooks to record a presentation for practice or submission.
 What about split screen? Some apps allow a student to record a window and their face at the same time. Cool, huh? One of the best applications for this is the recording of presentations. Let’s say you want a student to record a presentation for practice. Or, you want them to record a presentation to send to a peer for review. Or, you want them to record a presentation for you to grade from home. Easy. Use MoveNote. This app allows students to record two screens at once. One is their presentation file (Google Slides, PowerPoint, PDF); the other is their face in the webcam. The app is simplified in that it uses the student’s Google login to run, so they can use their student account for the work.
Advanced Tip: Using Prezi? MoveNote will not show a Prezi presentation as is with all animation, but it will take a PDF download of the presentation. The student can still use MoveNote for practice and review, even if the full presentation will require live delivery. Check this out to learn how to download a Prezi presentation into PDF format.
Four: Students can use Chromebooks to record their work online. You can use Chromebooks to record lessons and instructions.
 What if you want to record a lesson or a set of instructions for students? What if you want students to record their own work on the Chromebook as part of a project portfolio? You can do that through the Screencastify extension. Download it into your Google account and use its simplified recording controls to record audio and video from the screen. You can even see an image of the speaker from the webcam if you wish and turn it off if you do not. Better yet, Screencastify links to a Google account, so students can directly upload the recording to their Google Drive.
Five: Students can edit footage together into a full movie.
 Your students recorded video. Now what? Well, they can submit what they have, of course, and that’s great for simple applications. But what if you want them to develop a multi-shot project? Students can produce a full movie with edits of multiple shots, imported still images, titles, transitions, and music with WeVideo. WeVideo is accessible for free through the student’s Google login. The free version lacks some of the power of the premium version, but with it, students can still upload up to 5GB of data and create videos up to 7:30. The app uses an efficient timeline format for importing and moving content to develop into a full movie.
Advanced Tip: Do you want to use professional music for your movie, but you’re afraid because of copyright issues? Check out this library of free songs for use in videomaking. As long as you attribute these users, they have no problem with your use of their song!
Our students are born and reared in a visually engaging and visually demanding world. If you give them the opportunity to explore the concepts of your class through video, you will not only access powerful skills they have, but also help them refine those skills for the next challenge. Have fun!
If you would like help with any of these applications, feel free to ask for help!
Would you like to add to this discussion? Share your experiences and expertise through the comment feature below.